Unity Editor Layout
Learn The In's and Out's of the Unity UI
What Is The Unity Editor:
The Unity Editor is the environment where you directly work on your projects. It offers a straightforward UI and is relatively quick to learn. Here you can edit all the components that are inside your game (scripts, artwork, lighting, objects, UI, etc). Scripts in Unity are typically written in a language called C# (similar to C++ or Java). Each script, when created, holds a template (more on this later). Unity ensures a smooth transition between scripting and a drag-and-drop user interface.
Initial Layout:
The default layout of Unity should look something like this:
![]()
Let’s break this down tab by tab:
1. Project:
At the bottom of your screen, you should see a tab called Project. Here, there are two main folders, Assets and Packages. For the sake of our courses. We will never directly edit the Packages folder. We mainly want to look inside the Assets folder.
Here’s what you should be looking for:
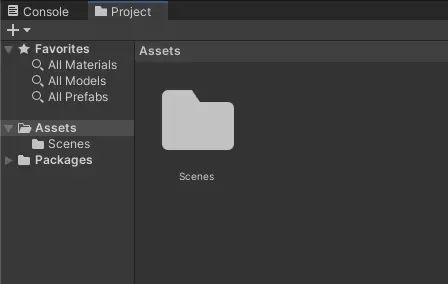
Assets Folder
The Assets folder is where all the files that we create for the project will be held. This includes objects, artwork, scripts, levels in the game, etc. The only folder in there by default is called Scenes. Think of each scene as a level in your game. You may have a main menu scene, a death scene, and scenes for each level in your game! For now, the default scene or Sample Scene is what we will be using.
2. Console:
The console tab (normally next to the Project tab) will display messages that are important to the developer:
- errors in our code
- warnings with our code
- messages we create that display expected results (more on this later) We will look at the console once we start scripting.
3. Hierarchy
On the left-hand side, you will see the Hierarchy:
 The Hierarchy includes every object that belongs in the scene (cameras, lights, players, enemies, bullets, the map, etc).
This is also where the game’s UI is held.
In a fresh project, the only object in the scene is the Main Camera. This is just as it’s described, the main camera. Anything that you see in the game is displayed through the eyes of the main camera. Let’s see what the camera contains.
To do this, let’s look over to the Inspector on the right-hand side of the Unity Editor.
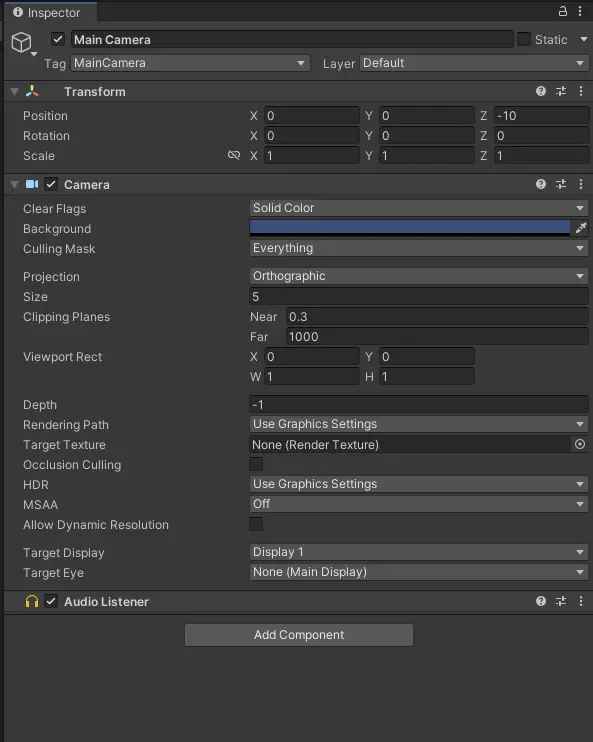
4. Inspector
The Inspector is where all the components inside an object are held. Components are essentially all the pieces that make up an object! Every object in the game contains a transform component. The transform component holds data such as the object’s position, rotation, and scale. For example, the Main Camera contains both a Camera component and an Audio Listener. Typically the components are pretty self-explanatory. An example of some components that a play may have would be a Collider that detects an in-game collision, a script that holds the code that controls the player, and possibly a component that controls physics.
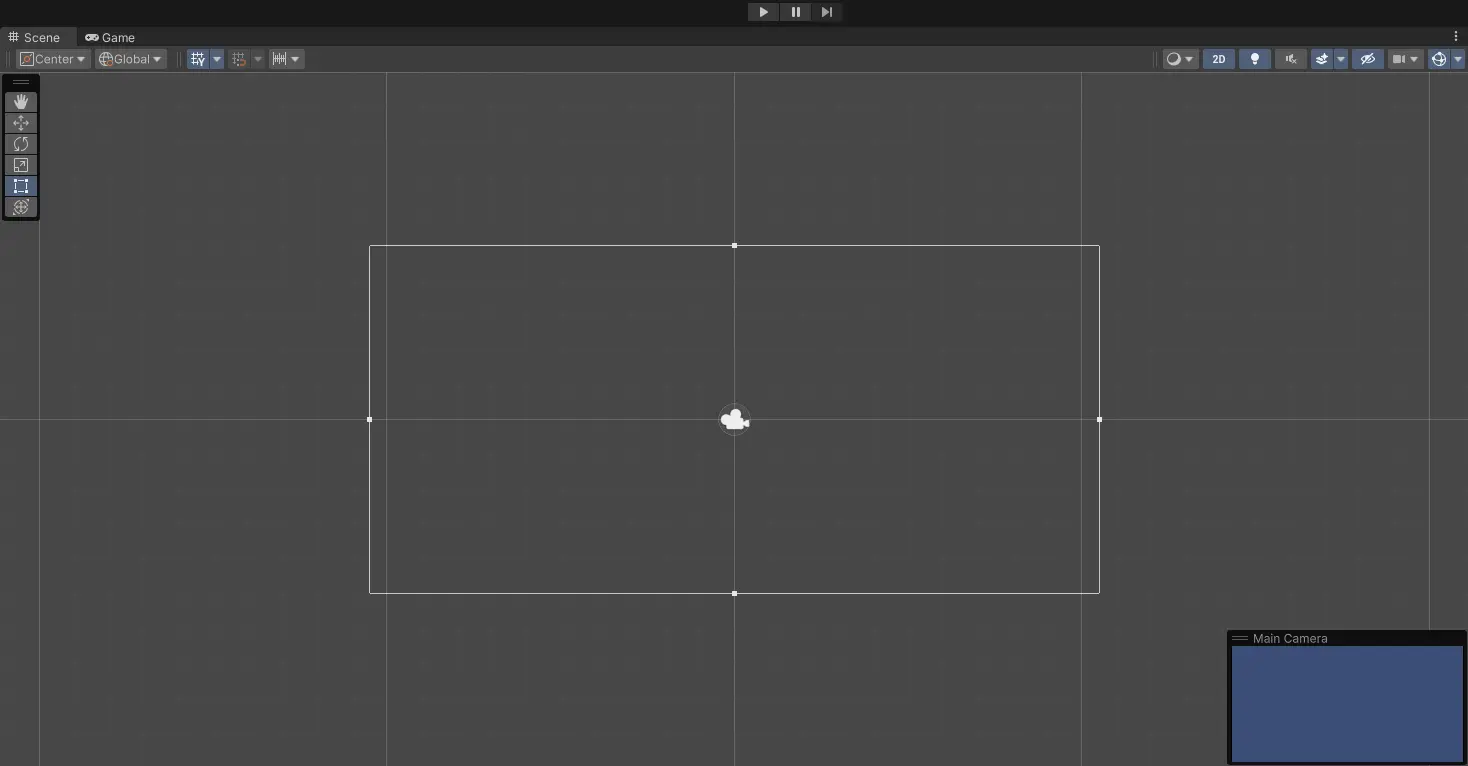
5. Scene / Game
Finally, the last two tabs in the middle of the screen go hand in hand. The first we will look at is the scene tab. I call this the scene view. Here we can manipulate the transform of objects and position things around the level. The game view is what the user sees when the game is played! Above the scene and game view tabs are a play and pause button. To test the game press the play button, to stop it, press play again. When the game is in progress, the start button is blue.
MAKE NOTE: you cannot make changes to the game while the game is running, meaning that you must stop play mode to edit the game and files.