Unity Hub
Learn How to Create a New Unity Project
Why Do I Need Unity Hub?
The Unity Hub serves as a centralized management tool for Unity developers, streamlining the process of handling multiple Unity projects. It makes project management and organization efficient. Here, you can create new projects both in 2D and 3D within seconds. The Unity Hub also includes game templates to start with! This is super handy if you just want to get a feel for Unity, but I always recommend creating a skeleton project (2D or 3D core).
To get started, download the Unity Hub!
Getting started:
Here’s what Unity Hub looks like after being installed and launched.

Notice on the left, there are a few tabs:
- Projects
- Installs
- Learn
- Community
Let’s take a look at the ones relevant to us. (Projects, Installs, and Learn).
Projects:
The projects tab is home to all of your Unity projects. This also is where you see version control, meaning you can see what version of Unity a specific project uses. This will likely be the most important tab.
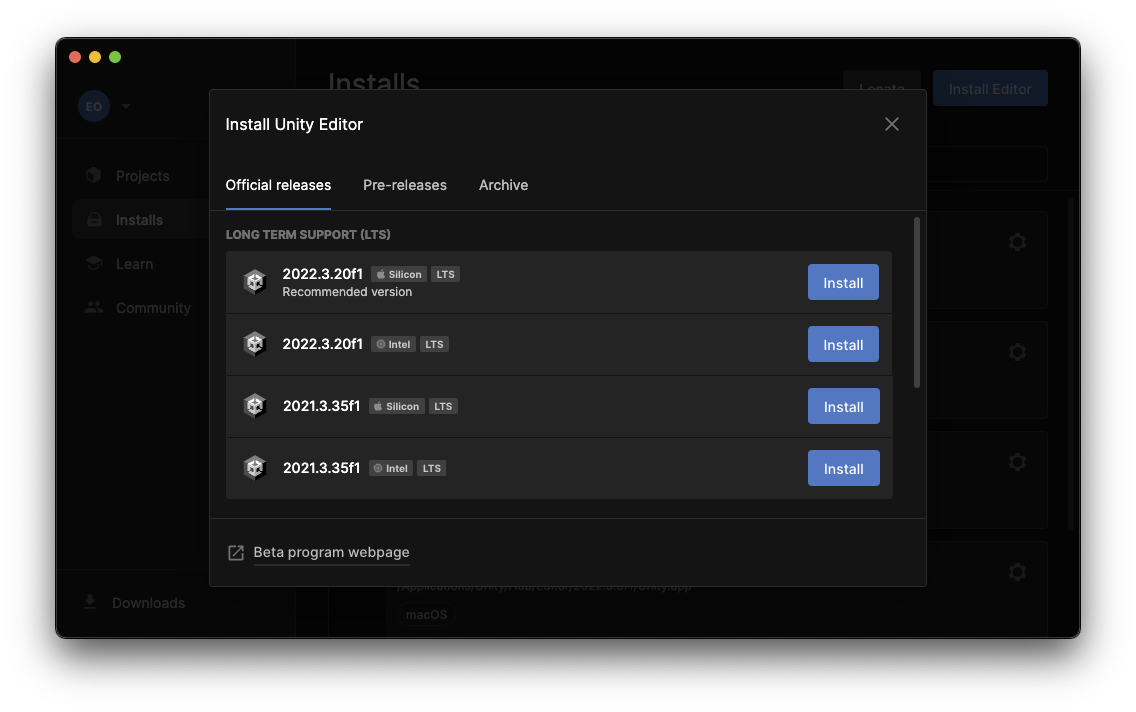
Installs:
Here, you can check to see what versions of the Unity Editor (more on this later) are installed. This is also where you can install the latest version of Unity. Let’s go ahead and install the latest version. In the top right, there is a blue button that says Install Editor. For the best results, stick to the official releases of Unity. The newest version (as of Feb 15th, 2024) is 2022.3.20f1. Go ahead and install this so we can move on to creating our first project.
NOTE: This could take a while on the first install.
Learn:
This tab displays a bunch of handy official tutorials made by the Unity team. If you want to learn more about certain subjects, this is a great place to check!
Creating a project:
For all the projects we create in the following courses, we will be creating 2D games, so I will be creating 2D projects. In the top right (after going back to the projects page), there is a button that says New Project. Go ahead and click on that. This should bring up a new screen that looks like this:
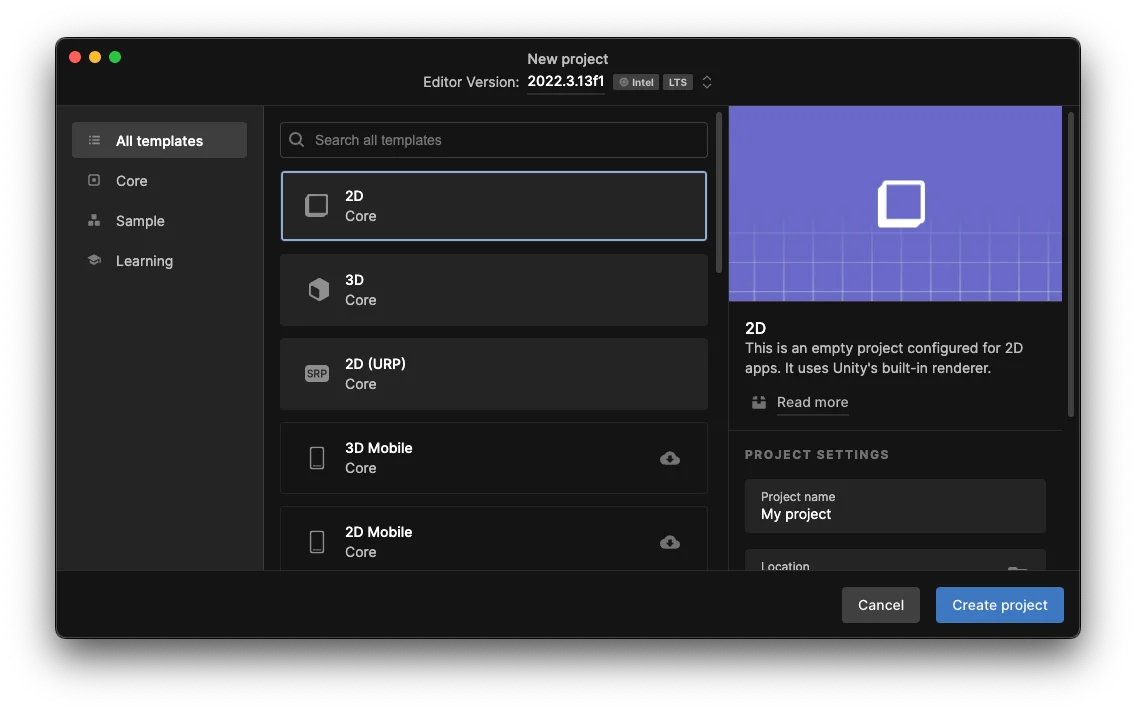
We are going to select “2D Core”. This means that we are creating a default 2D project that comes empty! This is great for starting a fresh project where we want to start from the ground up. On the right, there are a couple of settings you may want to change. First is the project name and location (directory) where we want to store our project. Remember where you put it!
When you are finished, go ahead and hit “Create Project” (bottom right) and move on to the next step.